Written by Andy Fein, luthier at Fein Violins
I bet you thought you'd click on this blog post, find out that brand name YamaSuzEastKnilAmatPfretz was the best, and away you would go in ten seconds with all the information you would need for your star student. Sorry, Not. So. Fast!
There are many, many adequate student instruments made each and every day. All over the world! But constructing the instrument is only half the job. Setting up the instrument correctly is the other half. And for student instruments, I would say the far more important half.

First, let's define a student instrument. In my experience, a student instrument is the first instrument a musician will play on, usually for a year or two. An instrument that will take them through Book One of the Suzuki method or another method. An inexpensive or rental instrument. Think it could be any old piece of junk with four strings and a bow? Wrong! For many budding musicians, this is the most important instrument they will ever play on.
Let's start with the basics:
1) First, make sure the student has the right size instrument.
2) After that, make sure there is real horsehair on the bow. Nothing else seems to work nearly as well as real horsehair.
3) Use decent strings on the instrument. My recommendation would be Helicore or Tonica. There are a few other brands that work well too. Whatever strings you use, avoid the cheapest strings. The cost difference between good strings and incredibly lousy strings is not much when you consider how much you're spending on a teacher and investing in practice time.
Carbon tailpieces with 4 fine tuners

Wittner Finetune Pegs
5) Use a decent bow. There are inexpensive carbon graphite bows that are far superior to fiberglass bows or inexpensive wood bows. How important is the bow? Remember- Without bows, stringed instruments would just be plucked! Also, if you get an instrument outfit (either online or in person) and you can't make any sound with the bow--- send it back and get a refund! Bows need to be rosined. If the bow you received has not been rosined that means two things- (One) The instrument has never been played or adjusted, and (Two) whoever you bought it from does not know anything about stringed instruments and how they work. Send it back!
Once you have these bare necessities covered, it's time for some details to make the instrument work and play for your budding stringed instrument superstar.
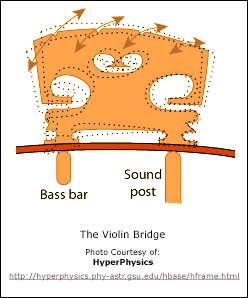
1) The bridge needs to fit. The feet of the bridge should match the curve of the instrument. The strings heights should be right. Not so high that you need vice grips for fingers to play, and not so low that the strings are hitting the fingerboard and buzzing. If you're using fingerboard tapes, the bridge has to be a bit higher than usual in order for the strings not to buzz on the tapes. If you get an instrument from a catalog or over the web and the bridge is not set up when you receive it, BEWARE! This usually means that no one has checked the bridge for fit or string height.
2) The fingerboard should have a slight hollow from end to end. I see many inexpensive instruments that do not have a hollow in the fingerboard. In fact, they often have a large bump where the neck ends. This will cause buzzing. Like crazy!
 |
| The fingerboard should have a hollow or scoop from end to end |
3) If you can not install the Wittner or Planetary pegs, make sure the traditional wood pegs fit. The taper of the peg needs to match the peg hole. A small amount of Hill Peg Compound will go a long way towards helping the pegs turn easily.
 |
| The string holes for the E & A are too far away from the peg head |
4) The holes in the pegs that the strings go through (the string holes) need to be in the right place. I see many student instrument where the string hole in the peg is too far over towards the peg wall opposite the peg head. Within a few months the string hole will be so far over the string can not possibly be tuned and you'll have constant string breakage. For years I wondered why so many student instruments had the string holes in the wrong place. "Come on, putting the string hole in the correct place takes no more skill or coordination than putting toothpaste on your toothbrush." And then I realized that the factories and wholesalers must be using pegs with pre-drilled holes. Some non-musician slaps some strings on and no one ever checks to see if the pegs work or if the holes are in the right place. Make sure your student instrument has it right!
5) Make sure the chin rest is comfortable. If it hurts, change it.
So, what is the BEST student violin, viola or cello? The instrument that has all or most of the above, fits your budget, and that you like the looks and sound of. Of course, I have my preferences. See them on our website- FineViolins.com
No comments:
Post a Comment